Want more ideas and freebies?
Get my free resource library with digital & print activities—plus tips over email.
Join for Free Resources →
$4.25
Ever wondered how to teach translations in an engaging way to your eighth-grade students?
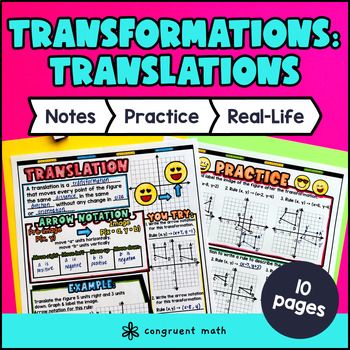
In this lesson plan, students will learn about rigid transformations, specifically translations, and their real-life applications. Through artistic and interactive guided notes, check for understanding, a practice coloring activity, and a maze worksheet, students will gain a comprehensive understanding of translations.
The lesson begins with guided notes that introduce the topic and teach students how to graph figures on coordinate planes after translation, write rules for translation using arrow notation, and write coordinate points for preimages and images for figures undergoing translation. The guided notes integrate checks for understanding to ensure that students are on the right track.
The lesson culminates with a real-life application exercise where students will read and write about how translations are used in real-life situations. This exercise allows students to see the practicality and relevance of the topic in the world around them.

$4.25
After this lesson, students will be able to:
Before this lesson, students should be familiar with:
As a hook, ask students why translations are important in the real world. You can provide examples such as map navigation apps like Google Maps or food delivery services like Uber Eats. Refer to the last page of the guided notes as well as the FAQs below for ideas.
Use the first page of the guided notes to introduce translations and how to graph figures on coordinate planes after translation. Walk through the steps of translating a figure using arrow notation and discuss the concept of preimages and images. Emphasize that the size and shape of the figure does not change during translation, only its position. Then, teach students how to write rules for translation using arrow notation. Discuss the four possible translations: up, down, left, and right. Model how to write translation rules for given examples and encourage students to practice writing their own rules using the two examples in the "You Try" section.
Use the second page of the guided notes to give students practice on graphing figures after translations, writing rules, and writing ordered pairs after translations. Based on student responses, reteach concepts that students need extra help with. If your class has a wide range of proficiency levels, you can pull out students for reteaching, and have more advanced students begin work on the practice exercises.
Have students practice translations using the practice maze worksheet activity. Walk around to answer student questions.
Fast finishers can dive into the color-by-number activity activity for extra practice. Alternatively, you can assign it as homework for the remainder of the class.
Bring the class back together, and introduce the concept of real-life applications of translations. Explain to students that translations are used in many areas of daily life, such as navigation and programming movements for robots in manufacturing. Use the last page of the guided notes "Real Life Applications" and allow students to read about a real-life situation that uses translations. Students also reflect on their learning using the self-rating section on the page.
If you’re looking for digital practice for translations, try my Pixel Art activities in Google Sheets. Every answer is automatically checked, and correct answers unlock parts of a mystery picture. It’s incredibly fun, and a powerful tool for differentiation.
Here’s 1 activity to explore:
A fun, no-prep way to practice translations is Doodle Math — they’re a fresh take on color by number or color by code. It includes multiple levels of practice, perfect for a review day or sub plan.
Here’s 1 activity to try:
Rigid transformations in geometry are transformations that preserve the size and shape of a figure. They include translations, rotations, and reflections.
A translation is a type of rigid transformation in geometry that moves a figure from one location to another without changing its size, shape, or orientation. It is also known as a slide.
To graph a figure after a translation, follow these steps:
Arrow notation is a way to represent a translation using arrows. The arrow starts at the preimage and points to the image. The length and direction of the arrow indicate the distance and direction of the translation.
To write the coordinate points for preimages and images after translation, use the following format:
Translations have various real-life applications, including:
Get my free resource library with digital & print activities—plus tips over email.
Join for Free Resources →